How To: Root Your Nexus 7 Tablet Running Android 4.4 KitKat (Windows Guide)
Whether you have the original Nexus 7, or the 2013 Nexus 7 tablet, rooting it will give you access to tomorrow's features, today.Sure, without root there's lots you can use it for. It's helped me get out of bed, became my own personal bartender, and a lot more.But with a rooted Nexus 7, you can install and use special features like KitKat's immersive mode, add extra swipe gestures, set separate home and lock screen wallpapers, and other cool Xposed Framework mods to personalize and automate your life.Rooting may sound like a tricky procedure, but it's really not. Thanks to an awesome root-kit made specifically for all Nexus devices (including both the 2012 and 2013 Nexus 7), the process for rooting is virtually painless.Update: There's a new root method available, and it's the easiest one yet. No need for USB cables, computers, drivers, or toolkits. Simply download an app, run it, and you're root 30 seconds later. Check out our guide here, it's worked flawlessly with 2013 Nexus 7's, but currently doesn't work for 2012 editions as well. Worst comes to worst, you can always come back to this guide, as that process does not erase any data. Please enable JavaScript to watch this video.
Before you begin, make sure you're on the latest version of Android, KitKat (version 4.4.X)—head to Settings -> About tablet -> System updates -> and hit Check now. If you're still on Jelly Bean, you may want to check out our previous rooting 4.3 guide for Windows, though the process is almost the same.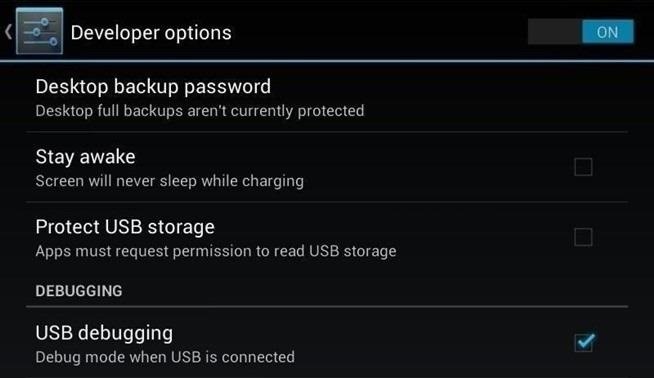
Step 1: Enable USB DebuggingYou need to allow the toolkit to make a connection to your Nexus, so you'll need to enable USB Debugging. Simply go into Settings -> Developer Options -> USB Debugging. If you don't see Developer Options, don't worry. Go into Settings -> About Device and tap on Build Number about 7 times. You'll see a toast notification pop up letting you know that you're a developer. Then simply go back and you'll see "Developer options."
Step 2: Download & Install the WugFresh Nexus ToolkitIf you don't know, this kit is a Godsend—it literally does all of the heavy lifting for us. Head over to the WugFresh website and grab the latest version of the Nexus Root ToolKit, which has been updated with KitKat 4.4.2. compatibility. You can also grab the direct download here. Whenever you run the app, make sure to right-click on the icon and select "Run as administrator".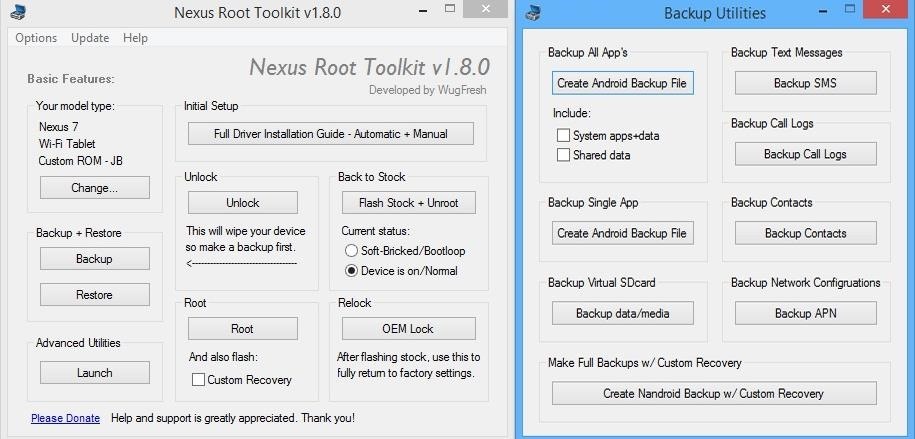
Step 3: Back Up Your NexusThe first step to rooting is unlocking the bootloader, which I'll get into a little later. Unfortunately, that process means that you'll need to wipe the data on your device. If you're not interested in starting fresh, the WugFresh toolkit has you covered. Select "Backup" from the left-most panel, then select the items you want to back up. In general, I only backup SMS and call logs because apps and contacts are restored once you sign in with your Google account.Unfortunately, app data is not restored automatically, so if you've got a great high score in Flappy Birds that you'd be sad to lose, you may want to back up your apps using the toolkit. Just select "Create Android Backup File," either under "Backup All Apps" or "Backup Single App." Alternatively, you can back up your Nexus 7 without root or a custom recovery using various other backup tools.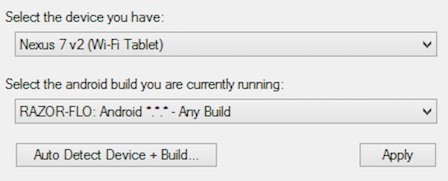
Step 4: Set Up the ToolkitWhen you initially launch the toolkit, you'll need to provide some basic information. Choose the specific Nexus device and build you have. If you're not sure what you input here, just select Auto Detect Device + Build. Next, you'll need to install the proper drivers for your device, if you didn't already do so through the backup process. All you do is select Full Driver Installation Guide and follow the simple instructions. After going through the driver installation, Unlock your device to make rooting possible. Unlocking will wipe the device.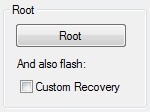
Step 5: Root Your Nexus 7Finally, you're ready to root. Check the Custom Recovery option to also apply TWRP custom recovery to your device, then click Root to initiate the process. With the custom recovery, you will have an extra step that includes tapping your screen a few times, but it's easy to follow with WugFresh. After the program runs its course, your device will be unlocked and rooted and will reboot.
Step 6: Make Sure You're RootedAn easy way to make sure the WugFresh toolkit worked and your Nexus 7 is rooted is to download the free Root Checker app from Google Play. Just open the app, select Verify Root, and wait for the results.
Unleashing WugFresh's Full PotentialNow that you've set up WugFresh with your device and are unlocked and rooted, let's quickly check out what else you can do with the toolkit. In the "Advanced Utilities" menu, you can take screenshots of your device, flash .zips without using a custom recovery, restore stock kernel and recovery, install apps (APKs), and much, much more.On the toolkit's main screen, you can also return your device to its original condition, removing root and re-locking the device. With WugFresh, the rooting process is extremely easy on Nexus devices. If you ran into any issues, just comment below and we'll help you out. And check out all of the Nexus7 softModder guides to start applying root-only mods to your device.
Cover image courtesy of Ministry127
Top 10 Photoshop Tricks You Can Use Without Buying Photoshop. Whitson Gordon. but you can still select areas in the same way with the regular lasso tool. Sometimes your photos get pretty
How To Get Photoshop For FREE! Download Photoshop For FREE
How to Solder Stainless Steel: 7 Steps (with Pictures
If you simply opened the download without asking Firefox to save it, it's possible that you can still access your file (if you did not close Firefox in the meantime). Files are are opened and not stored, are temporarily placed in a cache folder so you can use it while your Firefox session lasts.
This guide walks you through the first 12 things you should do when you get a new iPhone (and a 13th if the iPhone is for your child). These tips only scratch the surface of what you can do with an iPhone, but they'll start you on your path to becoming an iPhone pro.
The First 20 Things to Do with the New iPhone 7 (Plus)
mp3 ringtone / HTC Desire - YouTube
You can personalize your messages by adding a note in your own handwriting. Your friends and family will see the message animate, as if it were being written in front of them. To send a handwritten note, follow these steps: Open Messages and tap to start a new message. Or go to an existing conversation. If you have an iPhone, turn it sideways.
How to Search iMessages/Text Messages on iPhone
【Best Sleeping Headphones for Side Sleeper】Bluetooth control module is in the middle of speakers, won't press the ears, which is very comfortable for side sleepers sleeping.
SleepPhones Comfortable Headband Headphones for Sleeping
What's new in iOS 13? June 3, 2019: Apple releases iOS 13 beta 1 to developers. Apple has just released the first beta version of iOS 13 for developers. Follow the instructions below to install this beta. If you were waiting for iOS 13 to get started with beta testing, go ahead and download the latest version.
How to install iOS 13 beta 1 on your iPhone or iPad right now
News: BlackBerry KEY2 LE — $250 in Savings Comes at a Cost News: 7 Reasons Why the KEY2 Is a Return to Glory for BlackBerry News: BlackBerry Introduces the KEY2 — a Worthy Successor to the Iconic KEYone News: Google Names BlackBerry PRIV as One of the Most Secure Android Phones
PRIV named one of the most secure Android smartphones of 2016
Here's a simple tip that I just figured out myself the other day: hide your online status on Facebook! Why is this useful? Well, now that Facebook has built chat into the online interface (kind of like Google Hangouts running inside Gmail), your friends can start chatting with you any time you log into Facebook.
Keep Your Online Status a Secret on Facebook - Lifewire
Disable Bang and Olufsen Audio control 09-03-2018 03:36 PM I don't see how telling the original poster how to enable loudness equalization would help him with his question, which was how to get rid of the Bang and Olufsen software.
iPhone X Ringer Volume Very Low? Here's the Fix
osxdaily.com/2018/03/30/iphone-x-ring-volume-low-fix/
You can disable the attention awareness feature that scans your face and determines you're looking at the iPhone X, which in turn lowers the ring volume on the device. With this feature turned off, the iPhone X will stop lowering the ring volume of calls automatically when you pick up the iPhone and look at it.
Pontiac Grand Am - Best Place to Find Wiring and Datasheet
0 comments:
Post a Comment