How To: Make Custom Text Tones for Your iPhone Using iTunes
Your iPhone comes packed with a long list of excellent text tones to choose from. Bamboo anyone? Of course, for some of us, stock sounds from 2013 don't cut it anymore. We want customizability, something that's found more on Android than iOS. However, you can add your very own text tones to your iPhone right now, so long as you have a sound file in mind and a computer running iTunes.Text tones aren't the only sounds you can customize on your iPhone, though. You can even create custom ringtones for phone calls, alarms — anything you can think of that could use a longer tone. We'll focus on text tones here, sounds that you'd normally expect to last just a couple seconds at the most, but check out our ringtones guide if you're interested in learning custom ringtones.More Info: How to Make Custom Ringtones for Your iPhone From Any Song
Step 1: Add Your Sound File to iTunesWhether you want to use a small clip from a song for your tone or you have a killer sound you'd like to use instead, you'll want to make sure to add the file to iTunes before starting. To do so, take the sound file and drag and drop it over to your iTunes window. The file will automatically import, ready to begin the text tone process.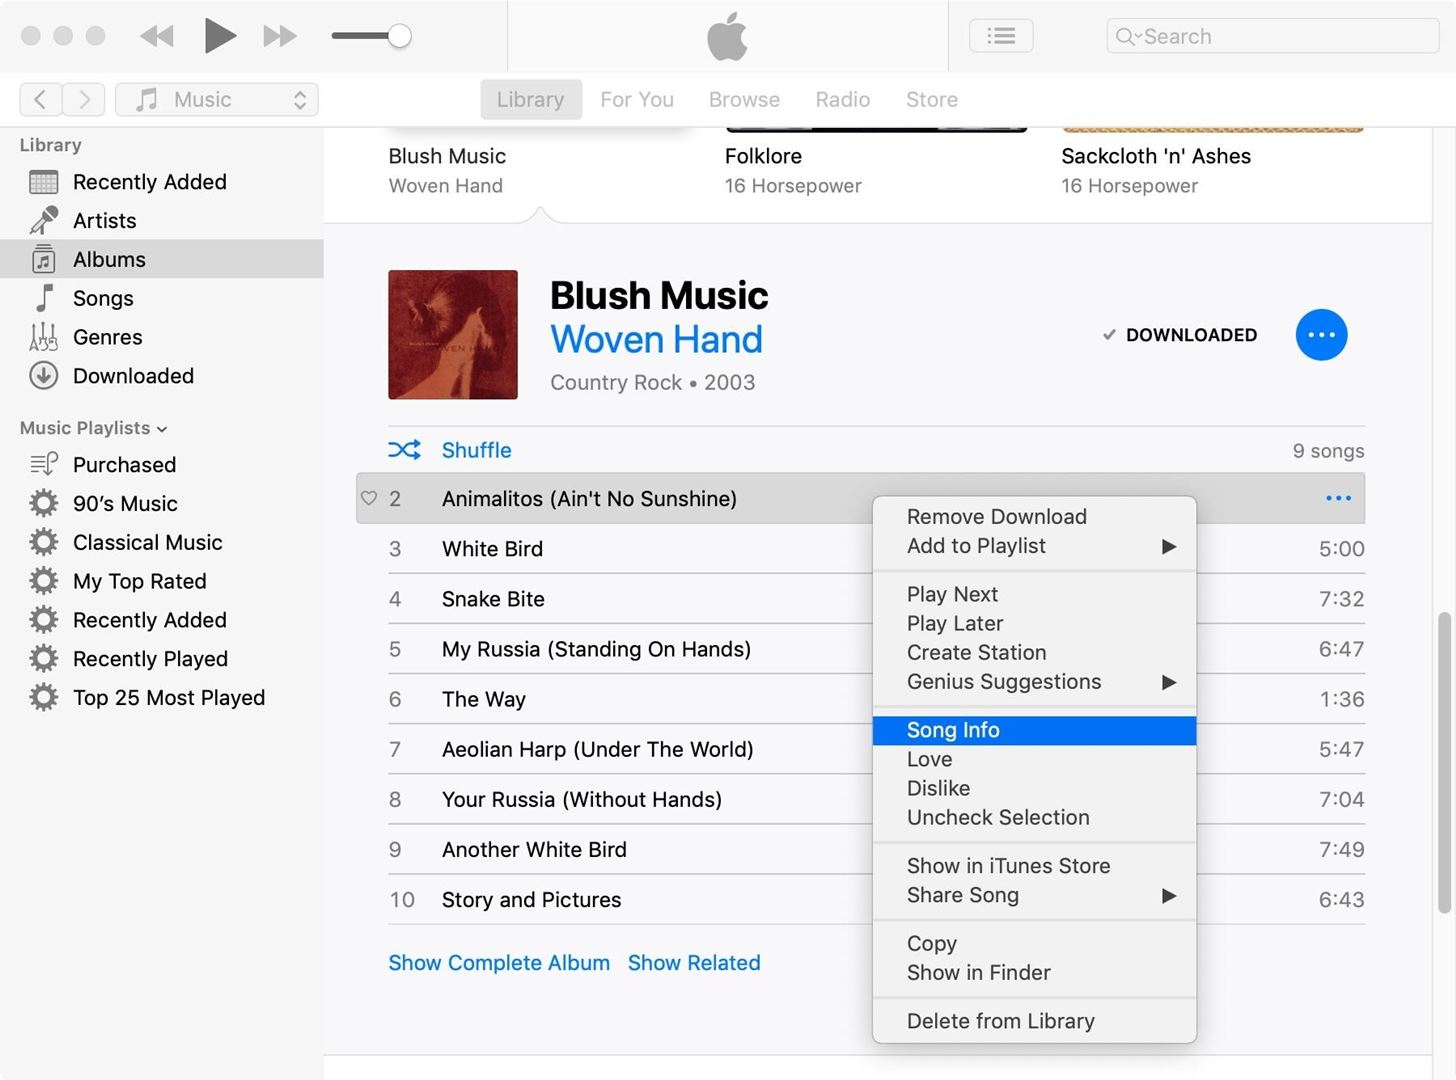
Step 2: Set Time Parameters (If Applicable)Text tones are meant to be as short as possible — most of us don't want ringtone-length alerts playing every time we receive a text! As such, if you want to use a small portion of a song as your text tone, you won't just want to upload the entire thing as a text tone.To help us here, iTunes allows you to set time parameters for songs — this gives you control over what portion of a song is able to play. While iOS supports tones as long as 40 seconds, for text tones, you might want to keep this parameter down to as little as one second. This is totally up to you, and you can repeat the process to experiment with as many time frames as you'd like.With your song in hand, highlight the track, then press Command-I (Control-I on Windows) to access the Song Info window (Get Info in previous versions of iTunes). Alternatively, you can select "Song Info" after right-clicking the song, clicking the ellipsis (•••), or clicking the "Edit" option in the menu bar. On this info page, click "Options." Take a look at the "start" and "stop" boxes. Here, you can enter the start time for your text tone, as well as the end time. If you're choosing any start or stop time other than the beginning or end of the song, make sure both checkboxes are marked. Leaving the start box unchecked will start the song at the beginning, and the stop box will let the song continue to the end, regardless of the time you've entered here.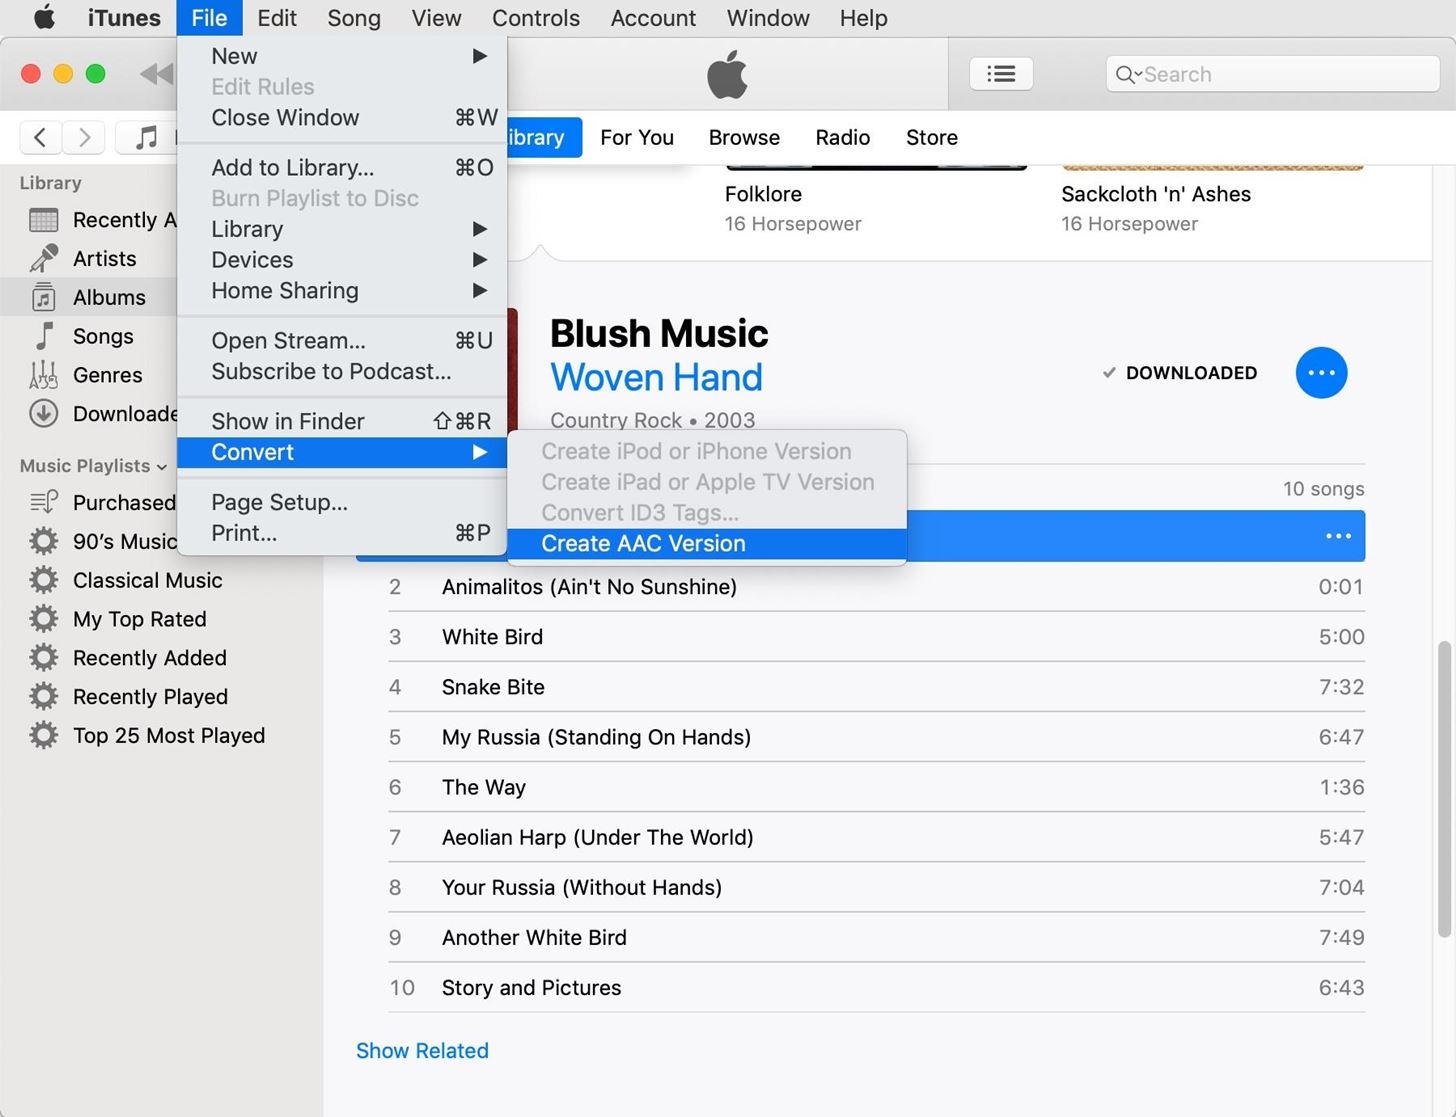
Step 3: Convert Your File to AACOnce your song or sound file is just the way you'd like it to be, you'll need to convert it to AAC, a file type with a higher-quality compression than MP3 but at the same bit rate. In short, it's a better file type and the kind you need in order to make a tone.However, you won't just be converting your file to AAC, you'll be making a copy, so you'll see two files in iTunes. If you're using a song with time parameters, your new copy will only be as long as your time limits. Instead of the full-length song, you'll see a new track listed at only one or two seconds (or however long you set the track to be).To begin converting, click "File" on the menu bar, then "Convert." Finally, select "Create AAC Version." Your file will be converted, spawning a new copy in AAC. Don't worry, the original file will remain untouched. You can delete that one from iTunes if you want or remove the start and stop times. If "Create AAC Version" doesn't show up as an option for you, your conversion settings are probably set differently than what they need to be. To change the settings, click "Preferences" in the menu bar, then click "Import Settings" in "General." Now, click "AAC Encoder" from the drop-down menu, click "OK," then "OK" once more to finish. Try converting the song now. Just make sure you have the option to convert to AAC.When "Create AAC Version" is greyed-out, however, that means your song is DRM-protected and cannot be used as a text tone.If using a song connected to an album, your AAC file should nestle itself directly underneath the original song. Random sound files, however, might make a duplicate outside of the original album. Just click "Recently Added" to make sure you're looking at the copied file. Before wrapping up here, make sure to go back to your original song file and reset the time parameters. Otherwise, you'll essentially hear your text tone every time you try to play the full song.
Step 4: Change Your File Type from M4A to M4RAAC isn't enough for iOS to register your file as a tone. Your text tone, which now reads as a .m4a file, needs to be converted further to .m4r. This file type is the standard for iOS tones.To convert your file to .m4r, drag and drop it to your desktop or right-click on the file in iTunes and select "Show in Finder." Either way, click the name of your file to access the name editor, then change its extension from .m4a or .m4r. While you're at it, change the song name to whatever you want your text tone to be called. Confirm the change on the popup, if one appears.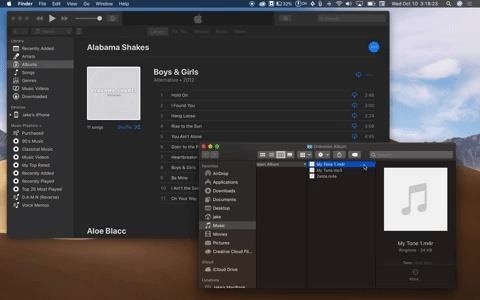
Step 5: Sync Your Text Tone to Your iPhoneThis step only works if you're running iTunes 12.7 or higher. Unfortunately, adding your new tone to your iPhone is trickier in older versions of iTunes. Skip to the next step if that applies to you. Check which version you're using by selecting "iTunes" in the menu bar, then clicking "About iTunes."On iTunes 12.7 or higher, plug your iPhone into your computer using a Lightning to USB or Lightning to USB-C cable, or, if syncing wirelessly, ensure your iPhone is on the same Wi-Fi network as your computer. You should find your iPhone in the sidebar on iTunes under "Devices."Finally, pick up the .m4r tone file you made and drop it onto your iPhone in iTunes. Your tone will then automatically sync with your iPhone and, when finished, will be accessible from your iPhone's settings. Skip to Step 9 to learn what you can do with it.Don't Miss: How to Save GarageBand Songs as Ringtones & Alert Tones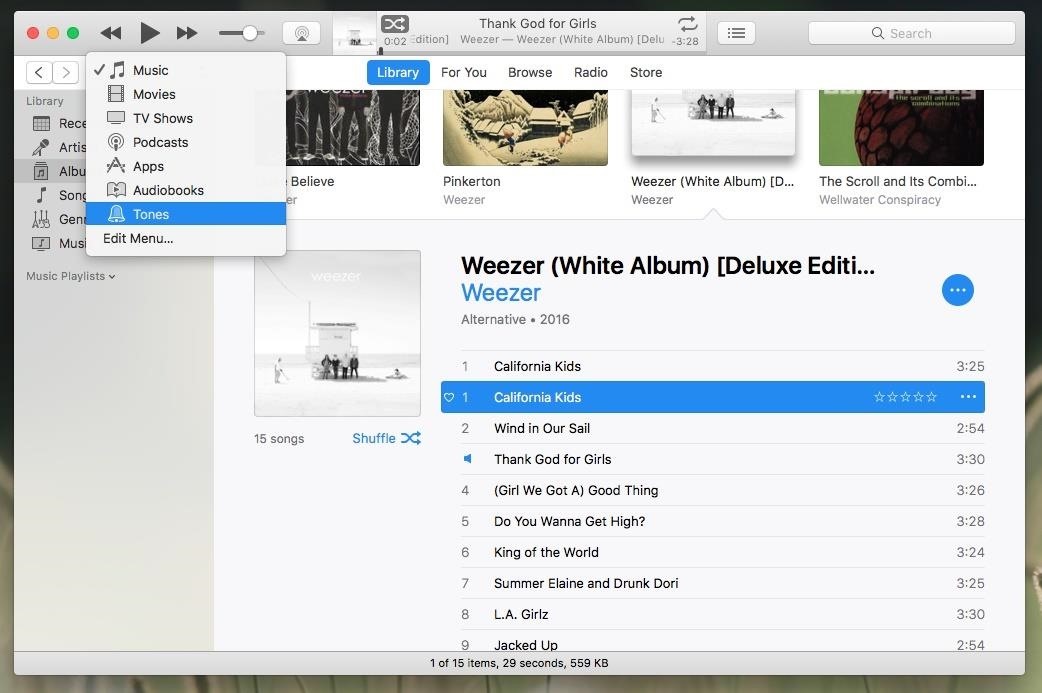
Step 6: Add the File to Tones (iTunes 12.6 & Under)As said above, if you're using iTunes 12.6 and under, this endeavor is a little more intensive. You won't be able to simply add your file directly to your iPhone, as these versions of iTunes have an individual "Tones" section. You have to place your tone here. Select "Music" in the top-left corner of the display, then click "Tones." If Tones doesn't appear, select "Edit Menu" then add it. If your tone is on your Desktop, just pick it up and place it back in the Tones section in iTunes. If you found it using "Show in Finder," just right-click on your tone, then select "Duplicate." Finally, drag and drop your file back to Tones.
Step 7: Clean Up Your iTunesYou don't want to leave behind the small mess you made in order to set yourself up for text tones. So, delete the duplicated shortened clip in the Music section, then go back to the original song and delete the start and stop times. If you already did this, you're all set.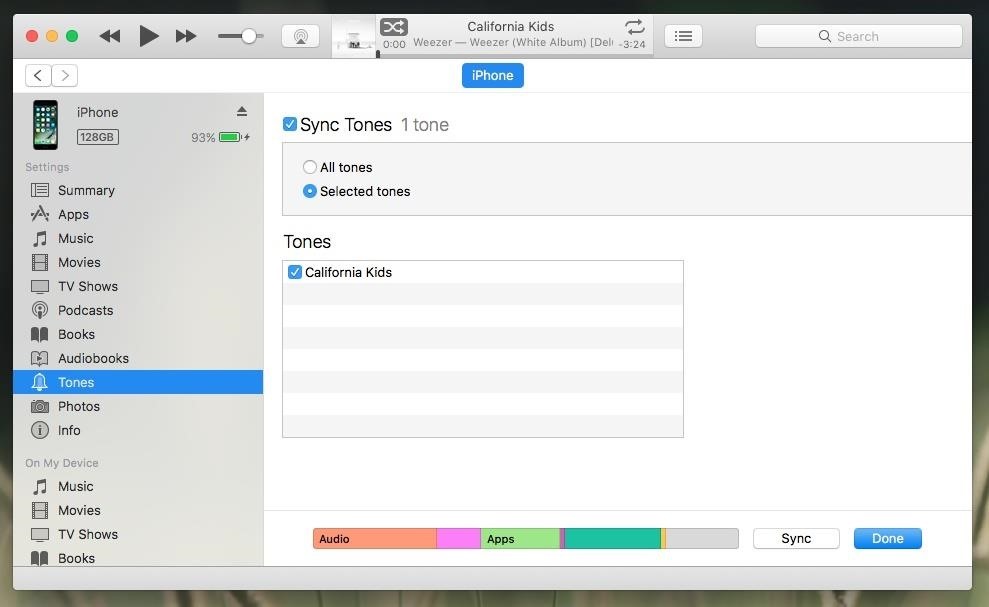
Step 8: Sync Tones with Your iPhone (iTunes 12.6 & Under)If you want to skip the cables and wirelessly sync your iPhone with iTunes, make sure the connection is set up ahead of time. Otherwise, plug your iPhone into your computer. If you don't see your iPhone right away, click the "iPhone" button in the top-left corner of the display to head to the Summary screen.Now, select "Tones" in the left-hand sidebar. If this is the first time you've synced ringtones or text tones to your iPhone, you need to check "Sync Tones," then "All tones" or "Selected tones" from the options. If you choose the second option, make sure the tones you need are checked. Finally, click "Sync." You can unplug your iPhone once syncing has finished.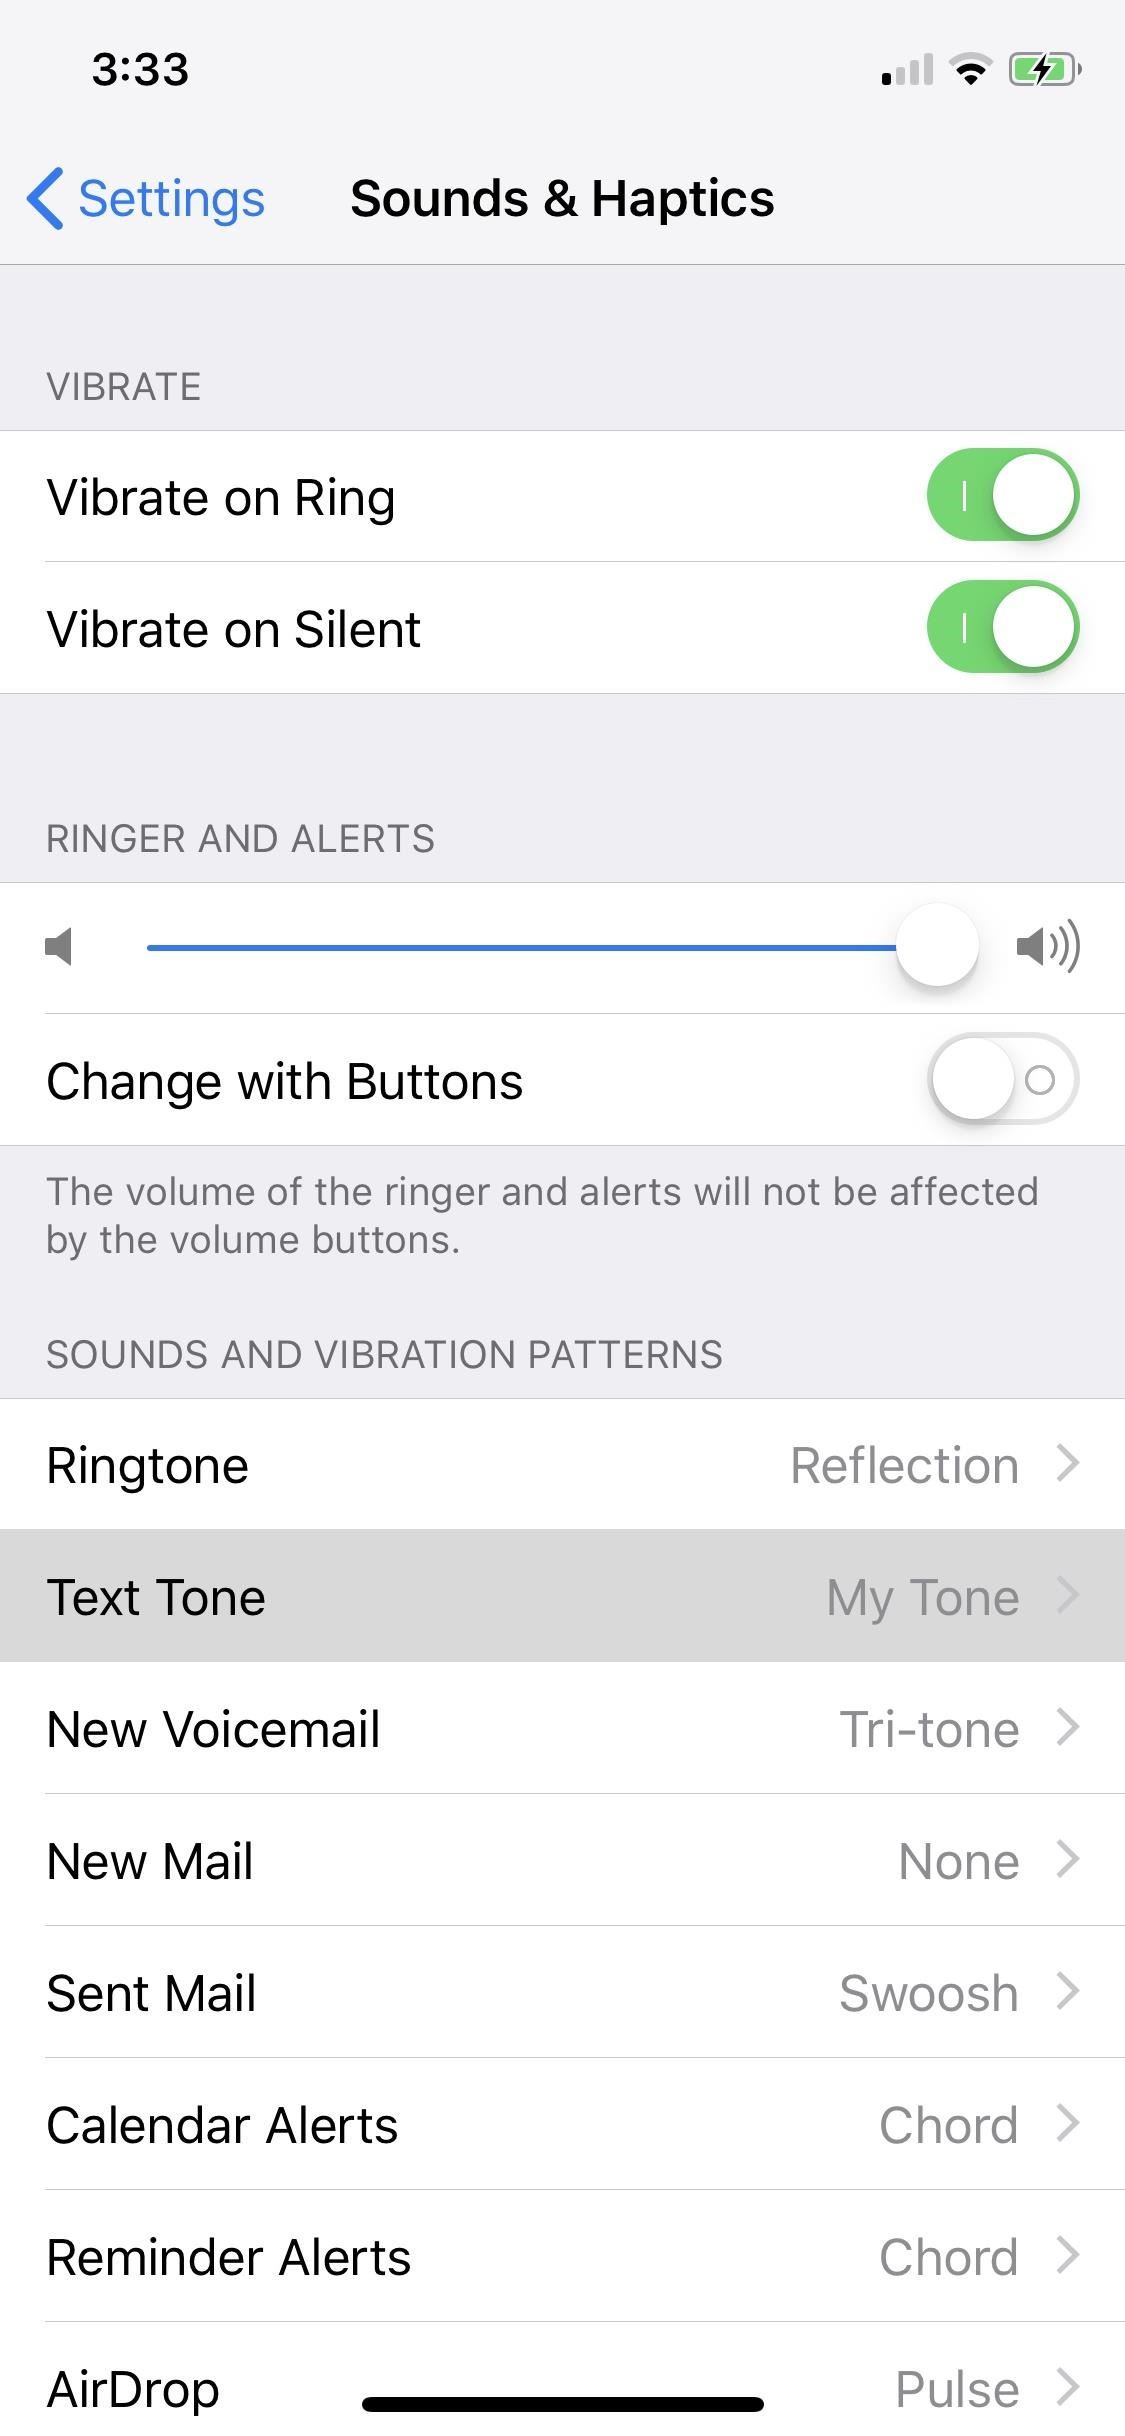
Step 9: Set Your Text Tone on Your iPhoneIf everything went well, you should find your tone on your iPhone. Jump over to Settings –> Sounds (Sounds & Haptics on recent models) –> Text Tone. Unfortunately, since you cannot differentiate between custom ringtones and text tones, your tones will be listed under the Ringtones section at the bottom. Your custom sounds will appear above the stock ringtones. You can even assign this custom text tone to specific contacts. Open each contact page, tap "Edit," select "Alert Tone," and select your custom sound.Don't Miss: How to Set Custom Vibration Alerts for Individual iPhone ContactsFollow Gadget Hacks on Pinterest, Twitter, YouTube, and Flipboard Sign up for Gadget Hacks' daily newsletter or weekly Android and iOS updates Follow WonderHowTo on Facebook, Twitter, Pinterest, and Flipboard
Cover image, screenshots, and GIF by Jake Peterson/Gadget Hacks
Experience real multitasking on your Android! Open more apps at the same time in floating windows and enjoy real multitasking! Don't leave current app for a small task Floating Apps is the largest and the most advanced collection of floating mini apps available on Google Play! • watch YouTube & movies while using your phone for other things
Tiny Apps: 5 Useful Floating Apps Suite for Multitasking in
The OnePlus 6T smartphone was launched at a global event held in New York. OnePlus 6T Event Roundup: Everything You Need To Know. By. It is the company's fifth-anniversary edition which
iPhone X Roundup — Everything You Need to Know About Apple's
Banish nightly cable fumbling with a wireless smartphone charger. If your smartphone is wireless charging compatible, the simplicity of placing it on a pad when you sleep, while you're at your
Unlike most wireless chargers, this $22 charger positions
With Control Center, you can quickly take a picture, turn on lights, control your Apple TV, and more. You can even customize Control Center so you have instant access to the things you do most.
24 hidden iPhone settings you should know about | Popular Science
Do you already have a home stereo system? Now you can play your music from your iPhone, iPad, iPod Touch, Mac or PC and have it play WIRELESSLY onto that sou
3 Ways to Connect Your iPhone to Your TV - wikiHow
Now, when you click Saved Passwords on the Options dialog box to view your passwords, you must enter your master password first. Some websites do not allow the saving of usernames and passwords, therefore, the Firefox Password Manager will not work with those sites.
How to View saved usernames & passwords in Firefox « Internet
How To: Get Flash Alerts When Receiving Calls & Text Messages on Your Samsung Galaxy Note 2 Samsung Android Pie Update: Galaxy Devices Are Getting Better Edge Lighting How To: Tell What's in a Text Without Looking by Activating Smart Vibrations on Your Samsung Galaxy S3 How To: Forget Remembering! Schedule Recurring Texts, Emails, Tweets
Set Beep Alerts to Warn You of Missed Messages « Android
Cookies These biscuits spark a position of understanding the surfing history and identify the user. Cookies also prepare personalization of internet browsing and have supplied web pages. This is a extremely quick method of deleting cookies out of the Mozilla Firefox browsing background.
Clear Cookies, History, Cache on Mozilla Firefox Browser
With Text Message Forwarding, the SMS/MMS messages that you send and receive on your iPhone can appear on your Mac, iPad, and iPod touch. You can then continue the conversation from whichever device is closest to you.
3 Ways to Block Text Messages on an iPhone - wikihow.tech
If you don't want specific people to be able to find you on Facebook -- at least for some time -- you can disable your account. As soon as you disable your Facebook account, you basically disappear from the Facebook service. Your Timeline will not appear in search results and will be inaccessible to other Facebook users.
How to Make Someone Disappear on Facebook « Internet
To add the branding watermark to your YouTube videos, navigate to "My Channel" and then click on the gear icon next to the subscribe button. Click on the blue "Advanced Settings" link. On the left hand side of the screen, click on "Branding" under the "Channel" header and then click the blue "Add a watermark" button.
How to Add Logo/Watermark to YouTube Video - Wondershare
0 comments:
Post a Comment